
In order for your clinic to take appointments, you must have at least one location and one room set up to link the appointment to. Within locations, you can set up rooms to link specific products and practitioners to. For information on managing rooms, see here.
Note: To create, edit, and delete locations, you must be assigned a user role that gives you editing permissions for Location settings. For more information on roles, see here.
In this article:
Create a Location Header (For Invoices and Prescriptions)
Add a Header to your prescription
Create a new Location
You can create any number of locations for your clinic, from the Settings page:
1. Go to the Locations tab in your settings.
2. Click New in the top right-hand corner.
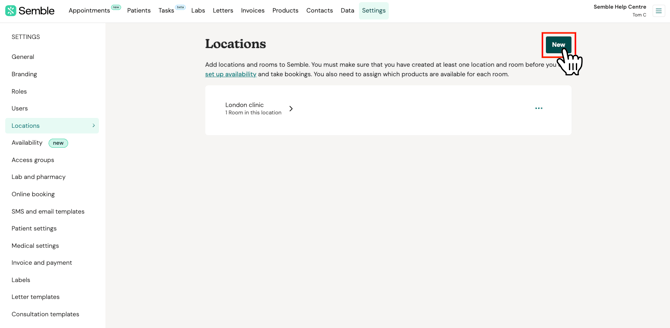
3. Fill out the General information for the location:
-
Name: The official name of the clinic's location
-
Address: The address of the location
-
(Optional) Minimum treatment age: To prevent patients younger than the set age from booking appointments online
-
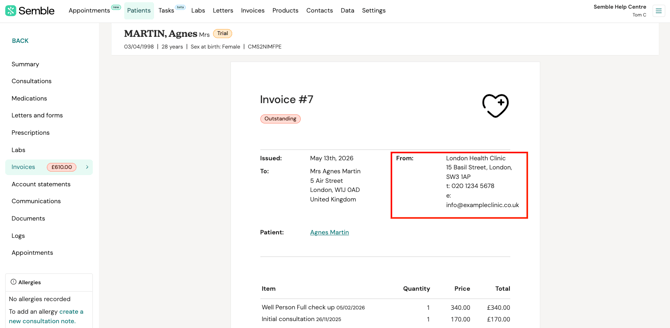
(Optional) Location header: The clinic information that appears on the top of invoices sent from the clinic, and in the footer of prescriptions
-
(Optional) Directions: Add access instructions to help your patients easily find the clinic.
If you do not add anything in the Location Header field, the address that will be shown on the invoice is the one in the General Information.

4. Click Save in the top right-hand corner.
The new location appears in your Location tab. For the location to take bookings, you must now create at least one room to link to the location. For information on how to create rooms, see here.
Edit a Location
You can edit an existing location at any time from the Settings page:
1. Go to the Locations tab in your settings.
2. Click the more options icon [ ] next to the location that you want to edit.
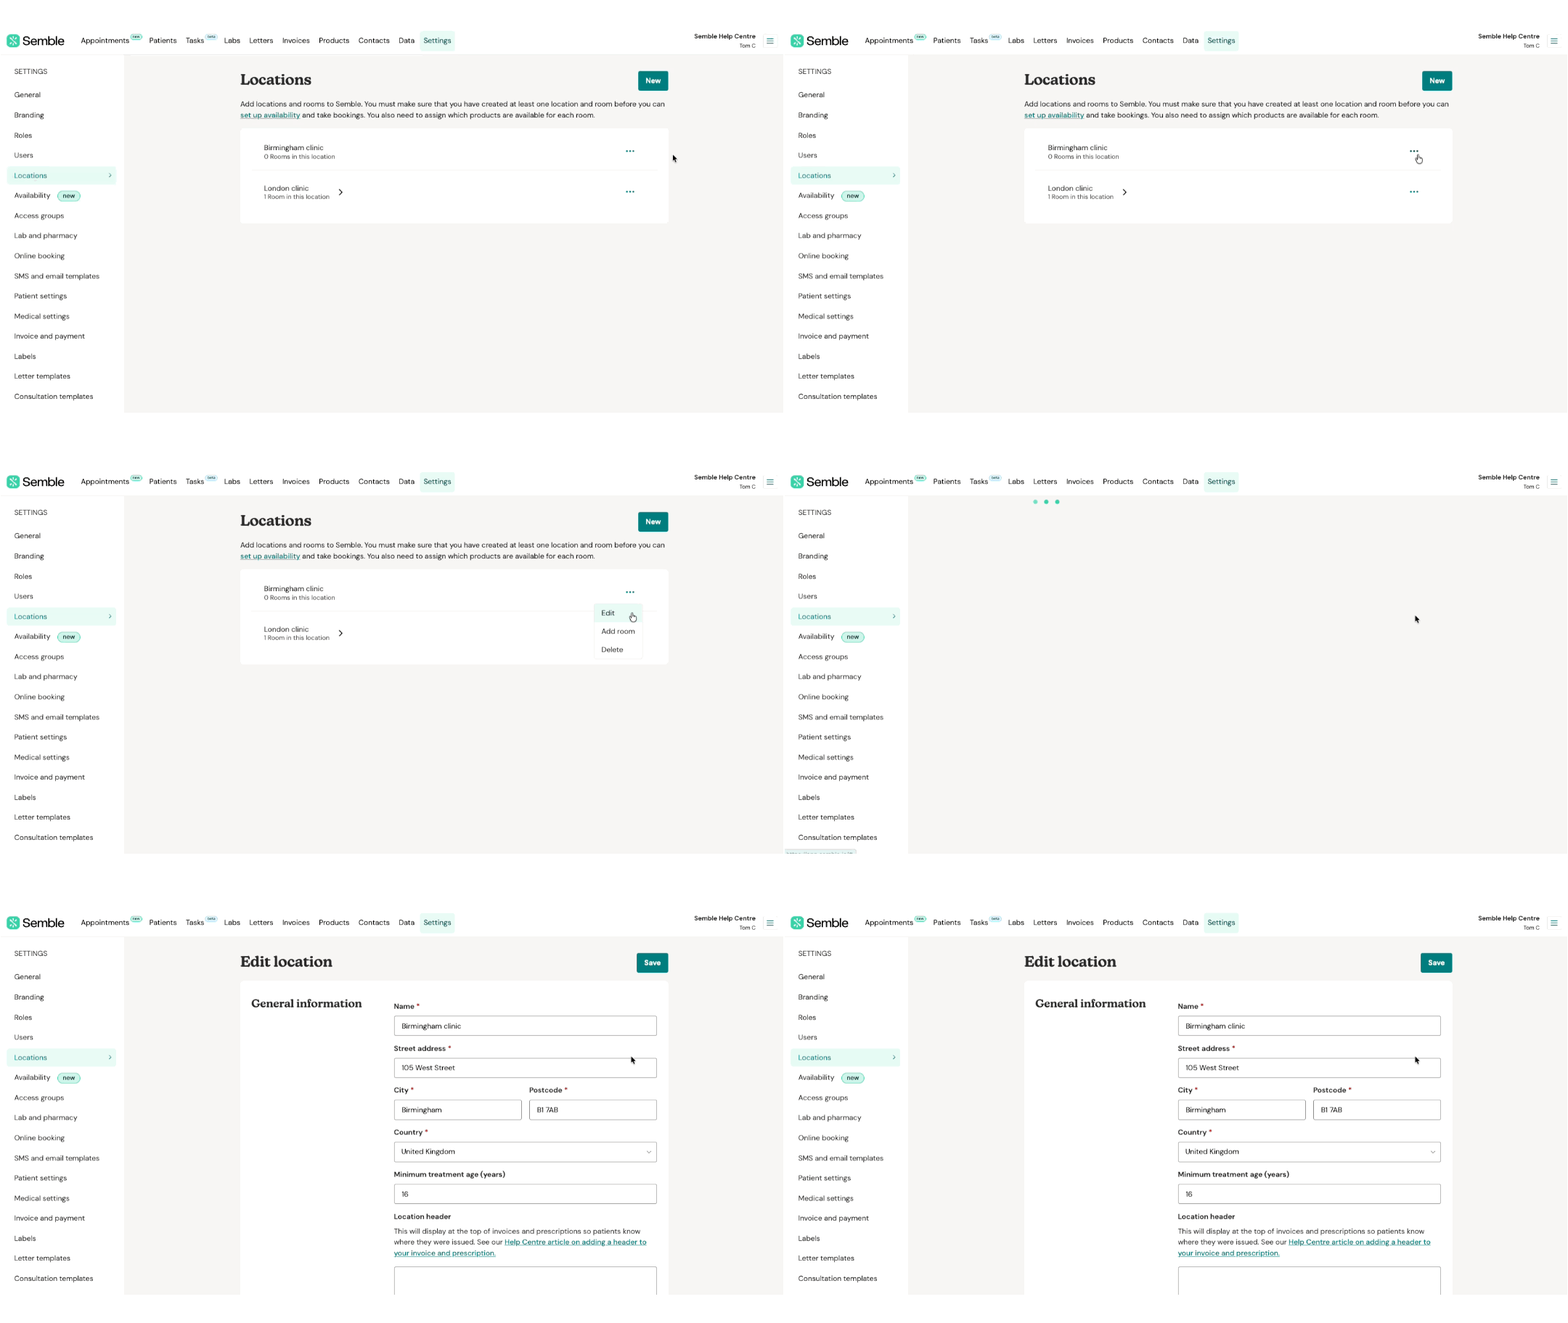
3. Select 'Edit'.
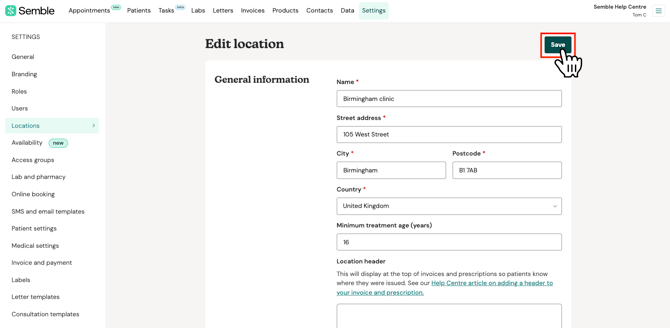
4. Make the changes you want.
5. Click 'Save' in the top right-hand corner.
Delete a Location
You can delete a location from your clinic at any time from the Settings page:
1. Go to the Locations tab in your settings.
2. Click the more options icon [] next to the location that you want to delete.
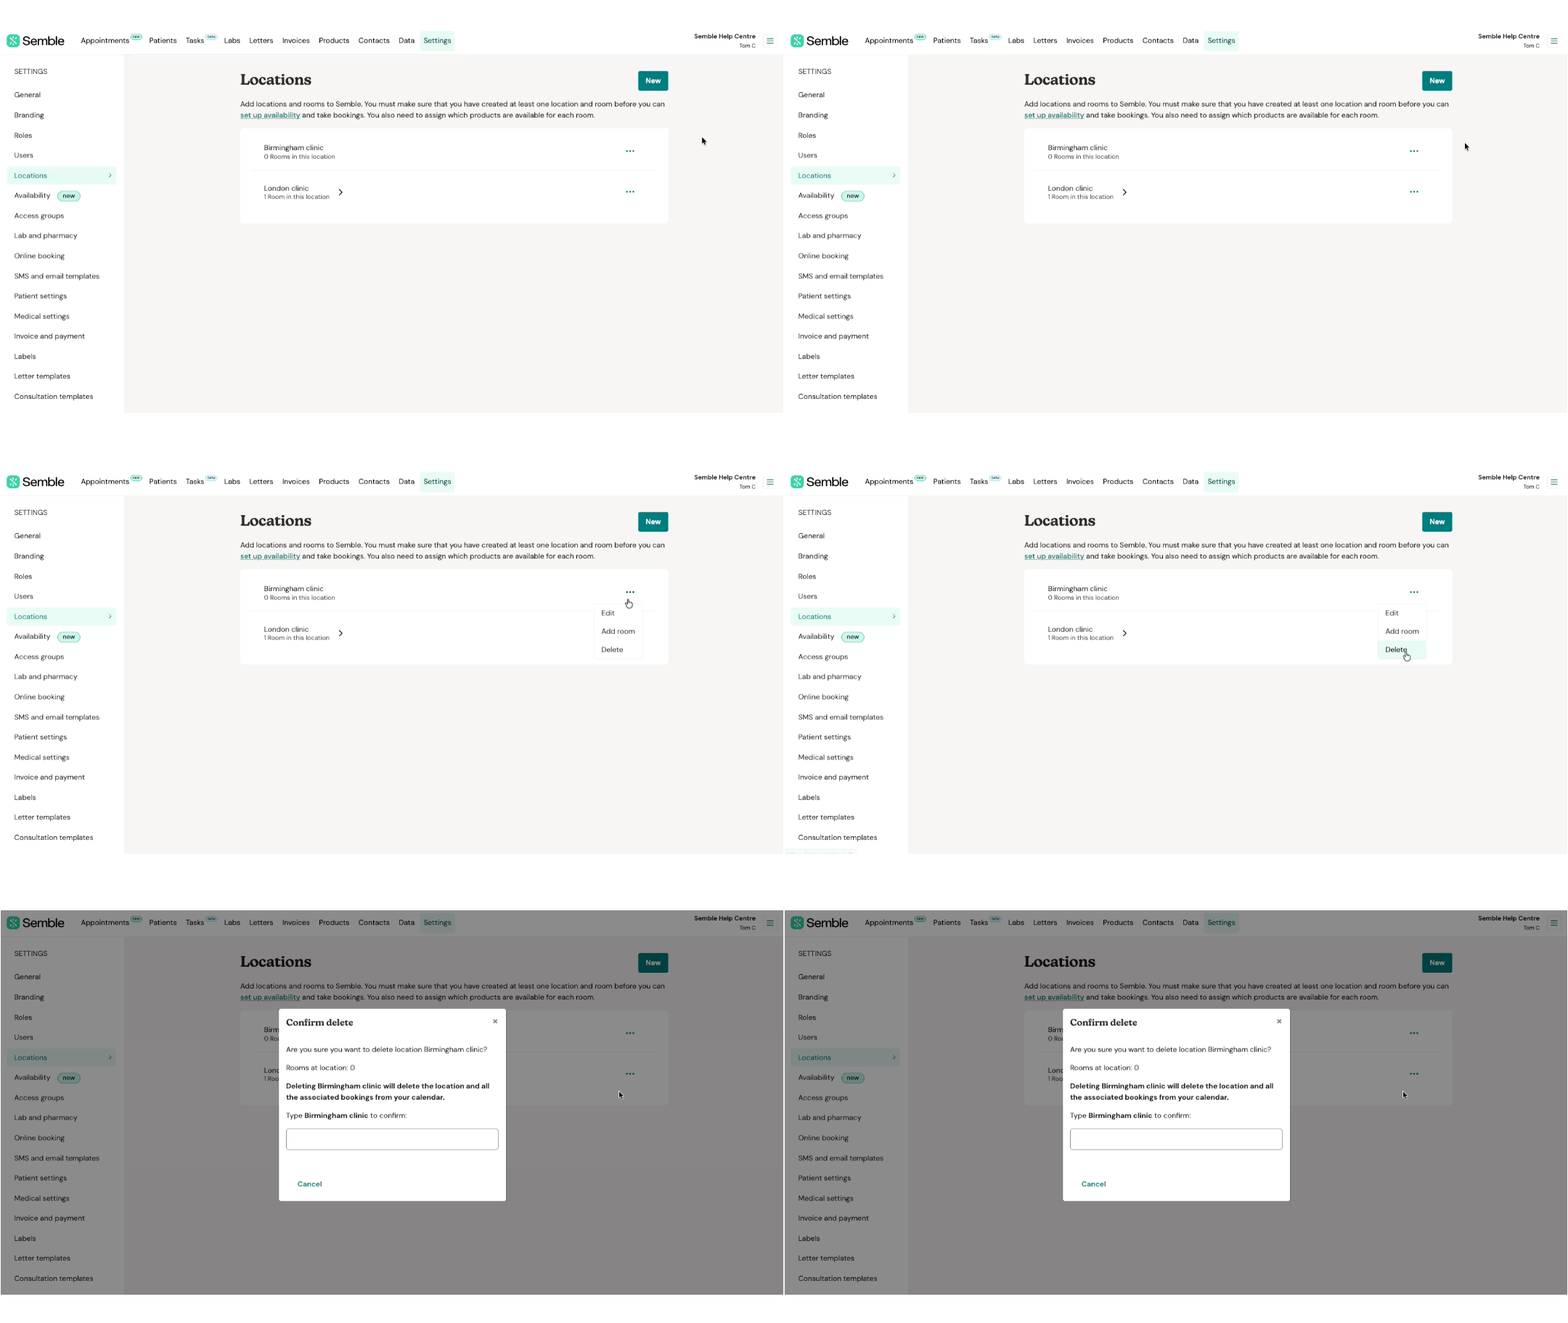
3. Select 'Delete'.
4. Type the full name of the location into the confirmation box. Note: Make sure you type any spaces or special characters in the name.
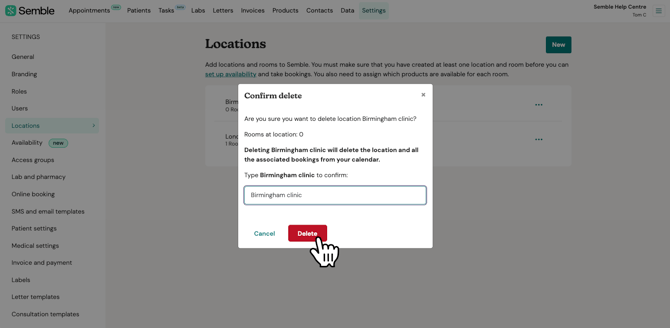
5. Click 'Delete' to confirm the deletion.
When a location is deleted, it is permanently removed from Semble and cannot be retrieved. Bookings that were made with that location disappear, however the bookings are not permanently deleted.
We recommend moving bookings to another location before you delete the location.
Manage location types
If you manage multiple locations, you can create location types and apply these to the locations across your practice. They can be used for reporting purposes.
Create a new location type
1. Go to the Locations tab in your settings.
2. From the Locations type section, click on '+Add location type'.
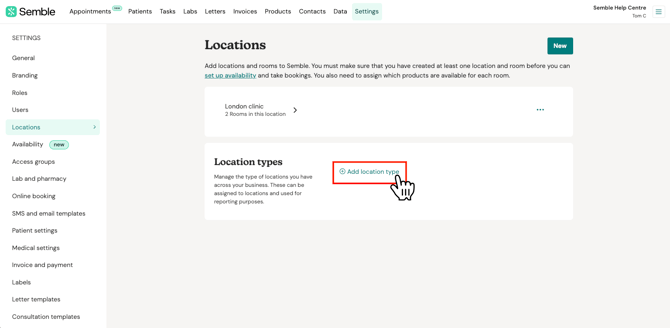
3. Type the name of your location type in the field, and then click on the tick icon to save.
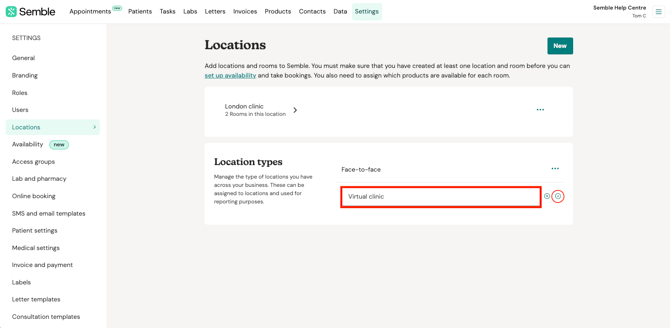
Apply location type to a location
1. Go to the Locations tab in your settings.
2. Click the more options icon [] next to the location that you want to manage. Select Edit.
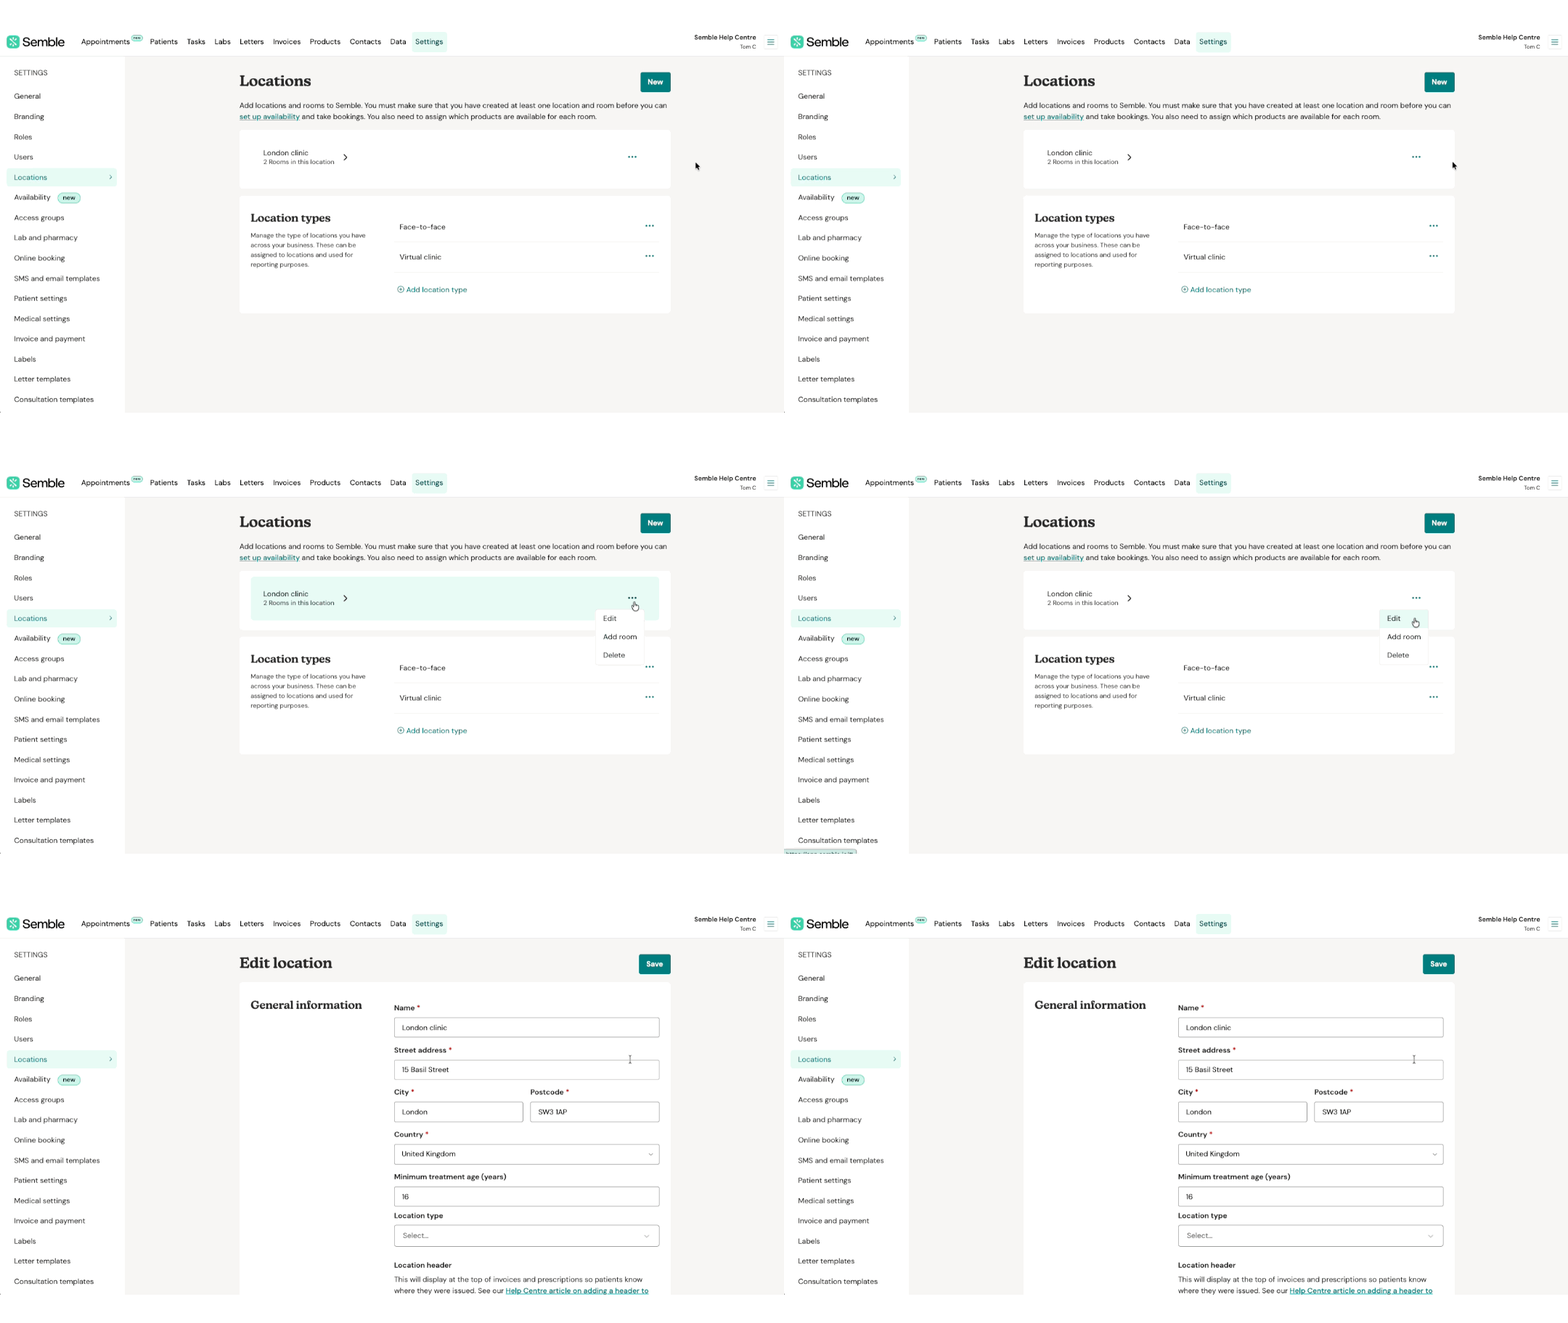
3. Find the Location type field and select the one you want to apply.
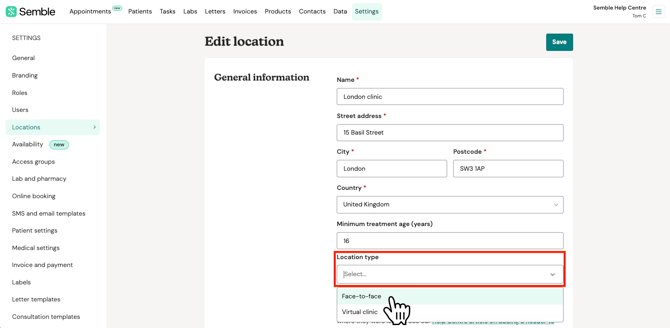
4. Click Save.
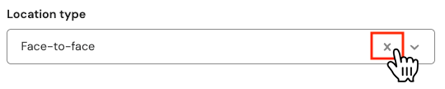
If you need to remove the location type later, click on the cross [ X ] shown in the Location type field and then click Save.
Delete a location type
1. Go to the Locations tab in your settings.
2. From the Locations type section, click the more options icon [] next to the location type that you want to delete.
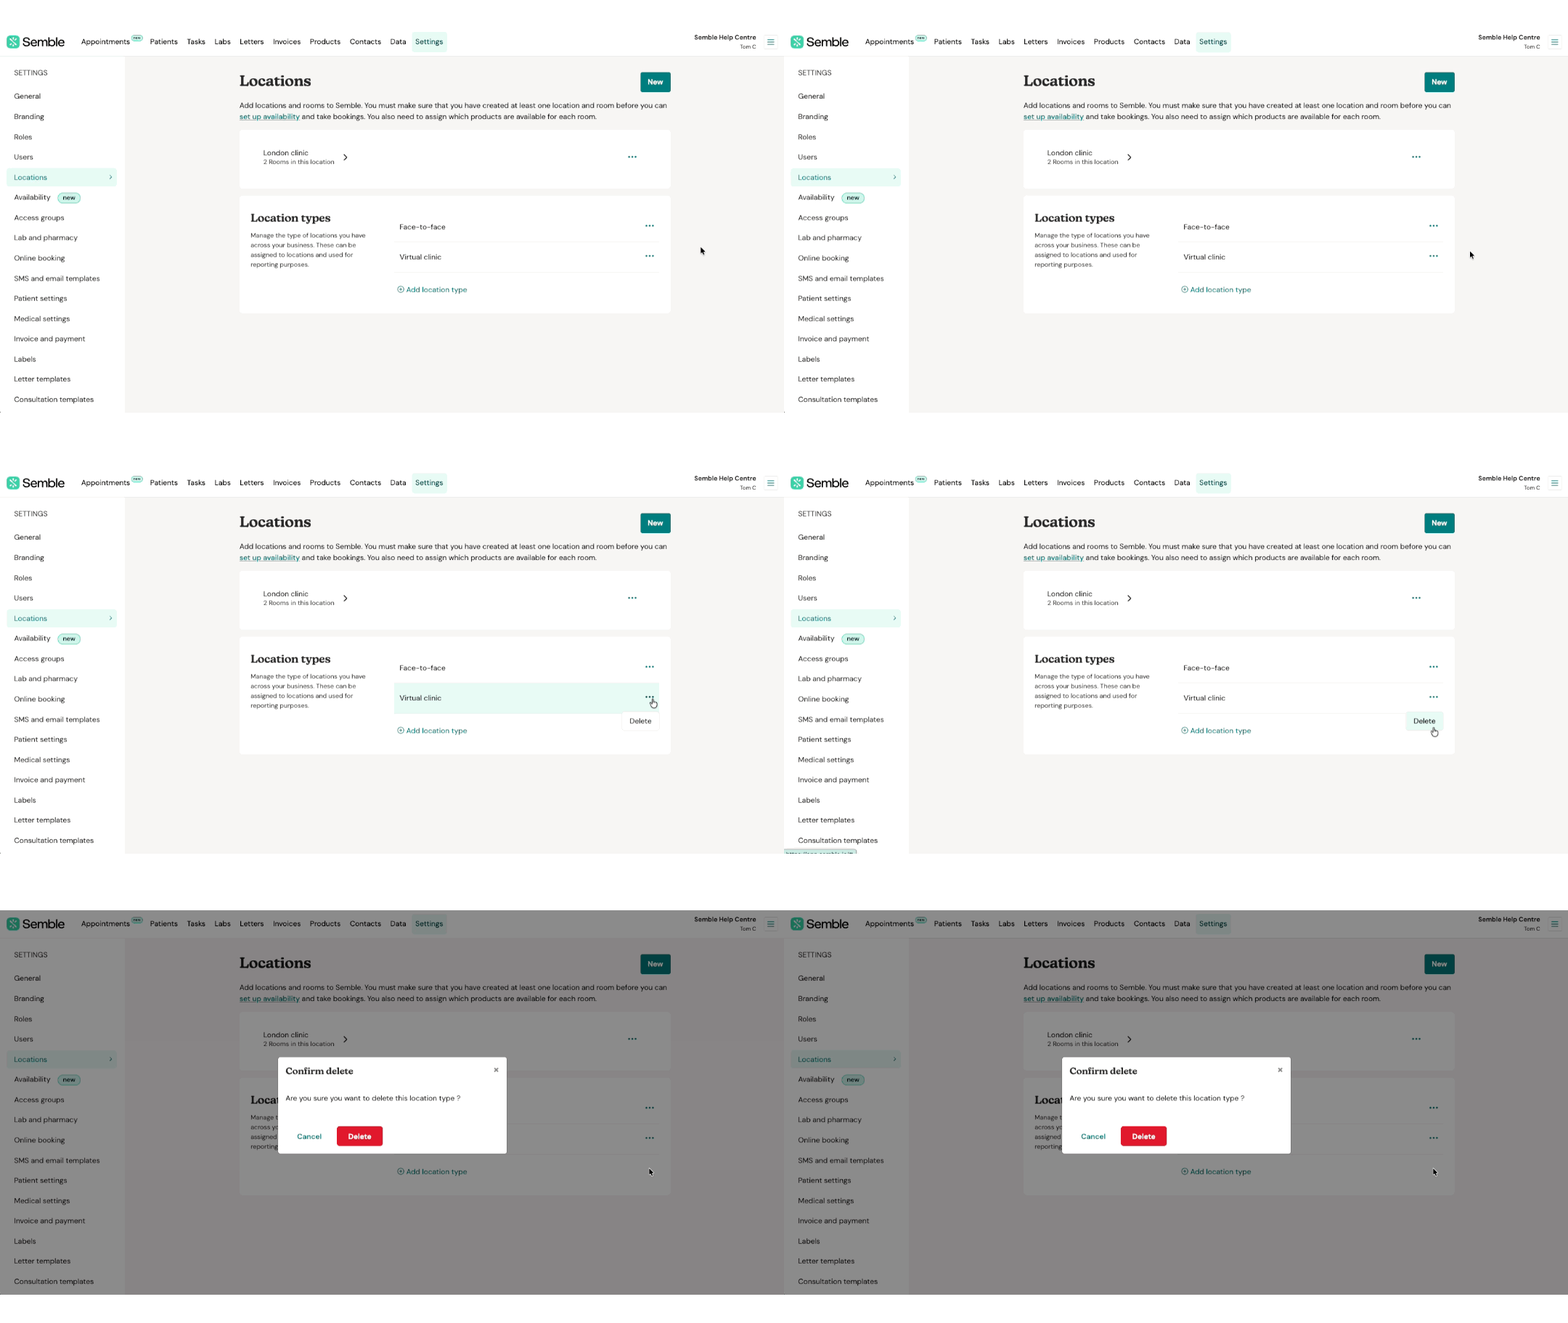
3. Select Delete and then click on Delete again to confirm.
The location type will be removed. If it was applied to any of your locations, it will also be removed from your location's settings.
You can't rename a location type once it has been saved. If you need to rename it, you should delete the location type first and then create a new one following the steps above.
Create a room
You can create any number of rooms for a location, from the Settings page:
1. Go to the Locations tab.
2. Click the more options icon [] next to the location that you want to add a room to.
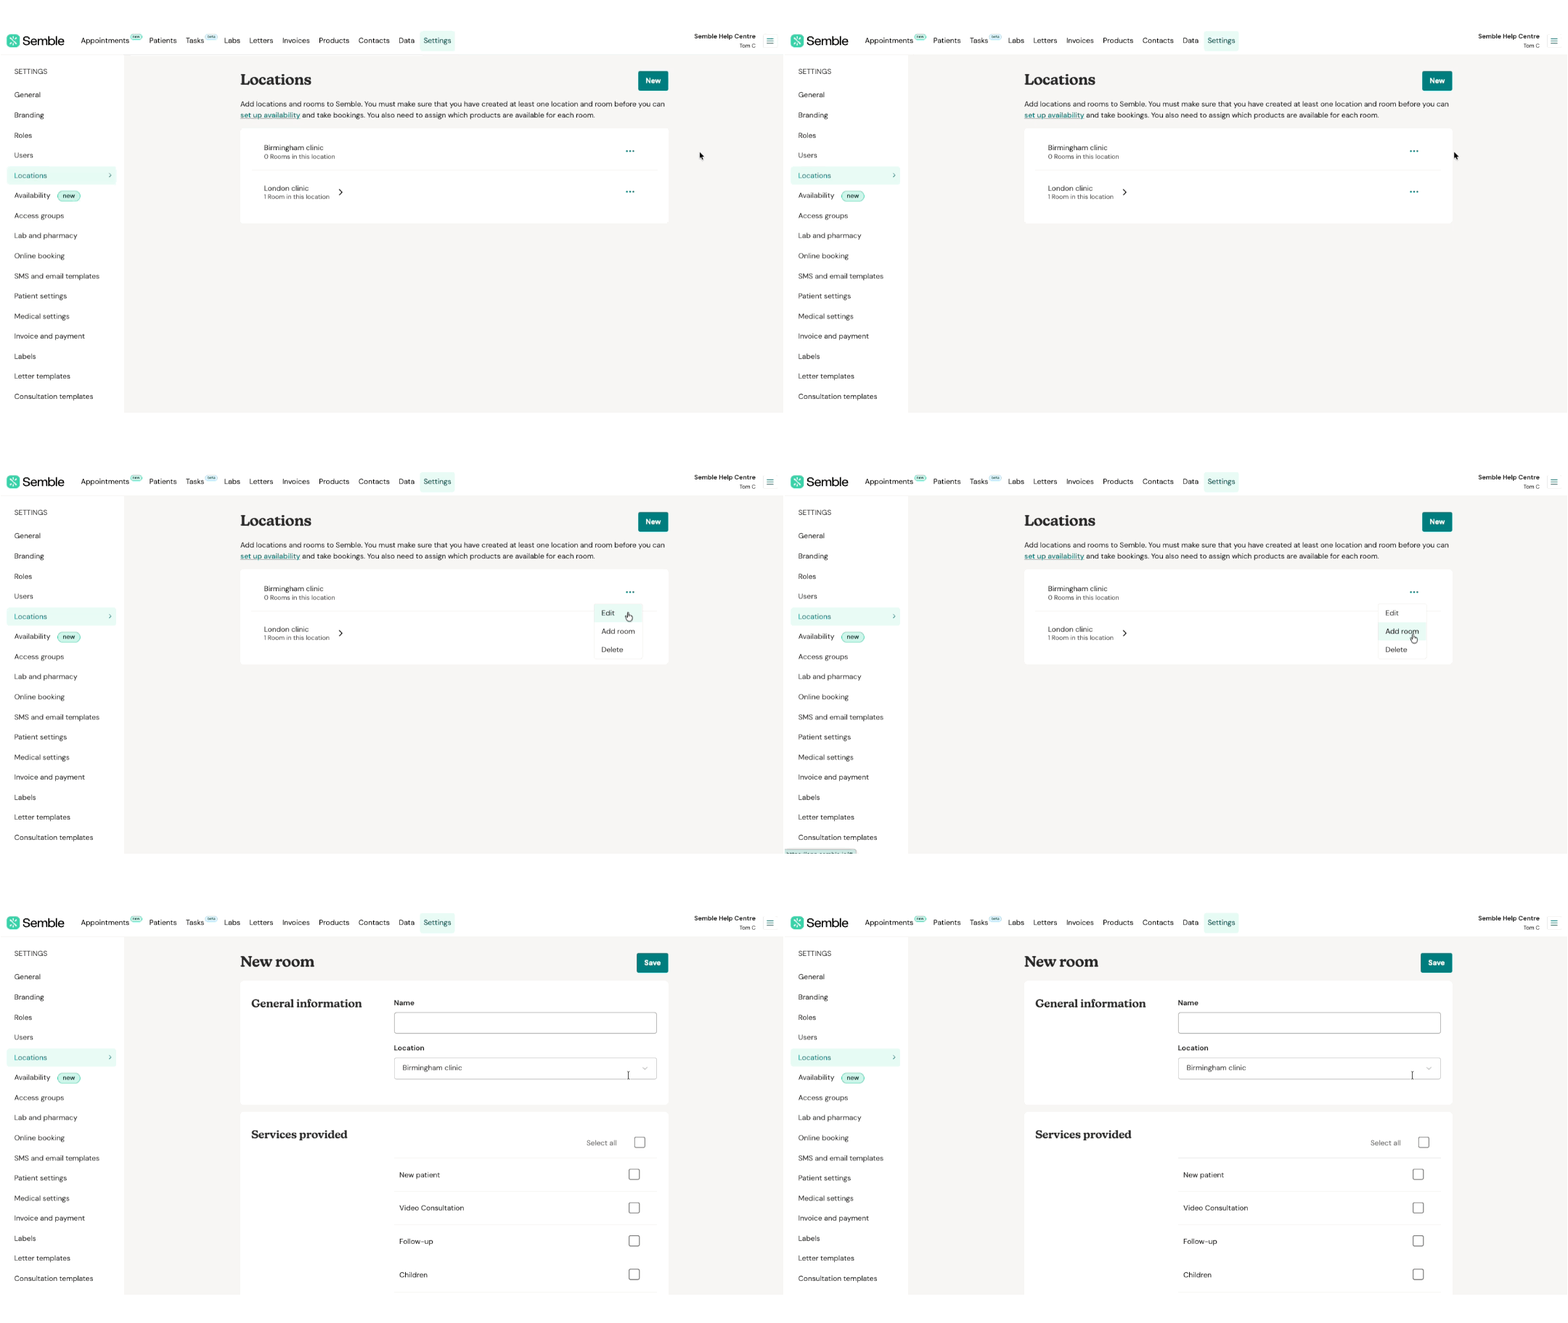
3. Select 'Add room'.
4. Fill out the General information of the room.
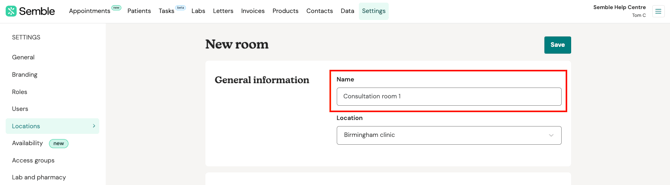
5. Scroll down to the Services provided section, and tick the products you want the room to be linked to.
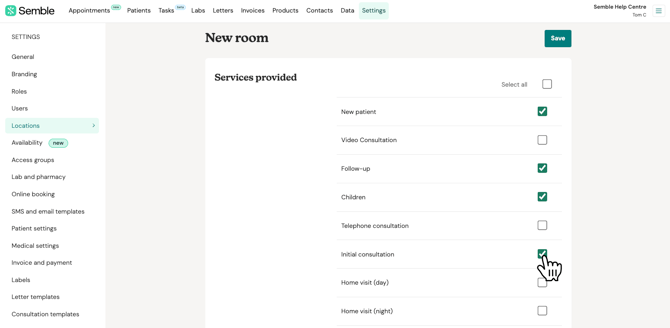
Note: The products you select will be the only available appointment types that can be booked into this room.
6. Click 'Save' in the top right-hand corner.
The room appears under the linked location, in the Locations tab. Users can now book appointments to take place in that room.
Edit a room
You can edit a room at any time from the Settings page:
1. Go to the Locations tab.
2. Select the location that the room is linked to.
3. Click the more options icon [] next to the room you want to edit, then select 'Edit'.
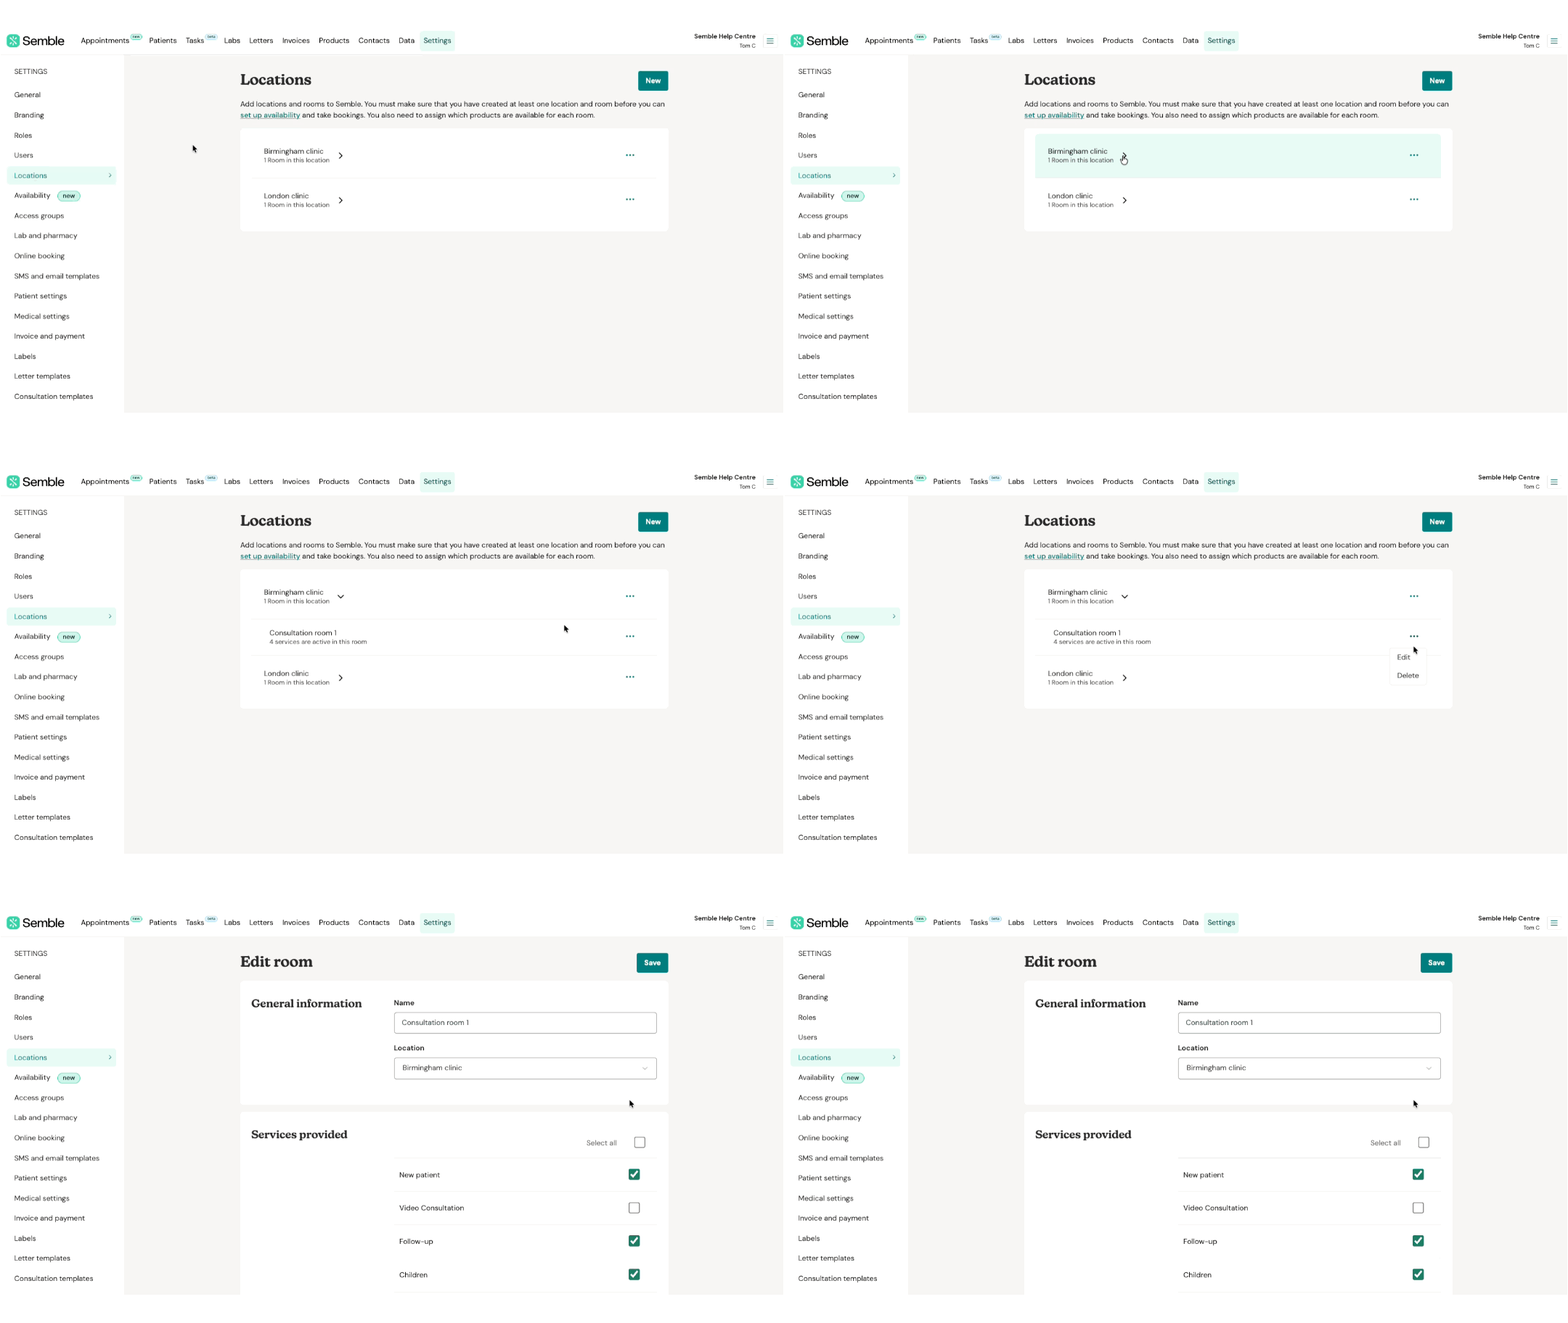
4. Make the changes you want.
5. Click 'Save' in the top right-hand corner.
Delete a room
You can delete a room at any time from the Settings page:
1. Go to the Locations tab.
2. Select the location that the room is linked to.
3. Click the more options icon [] next to the room that you want to delete, then select 'Delete'.
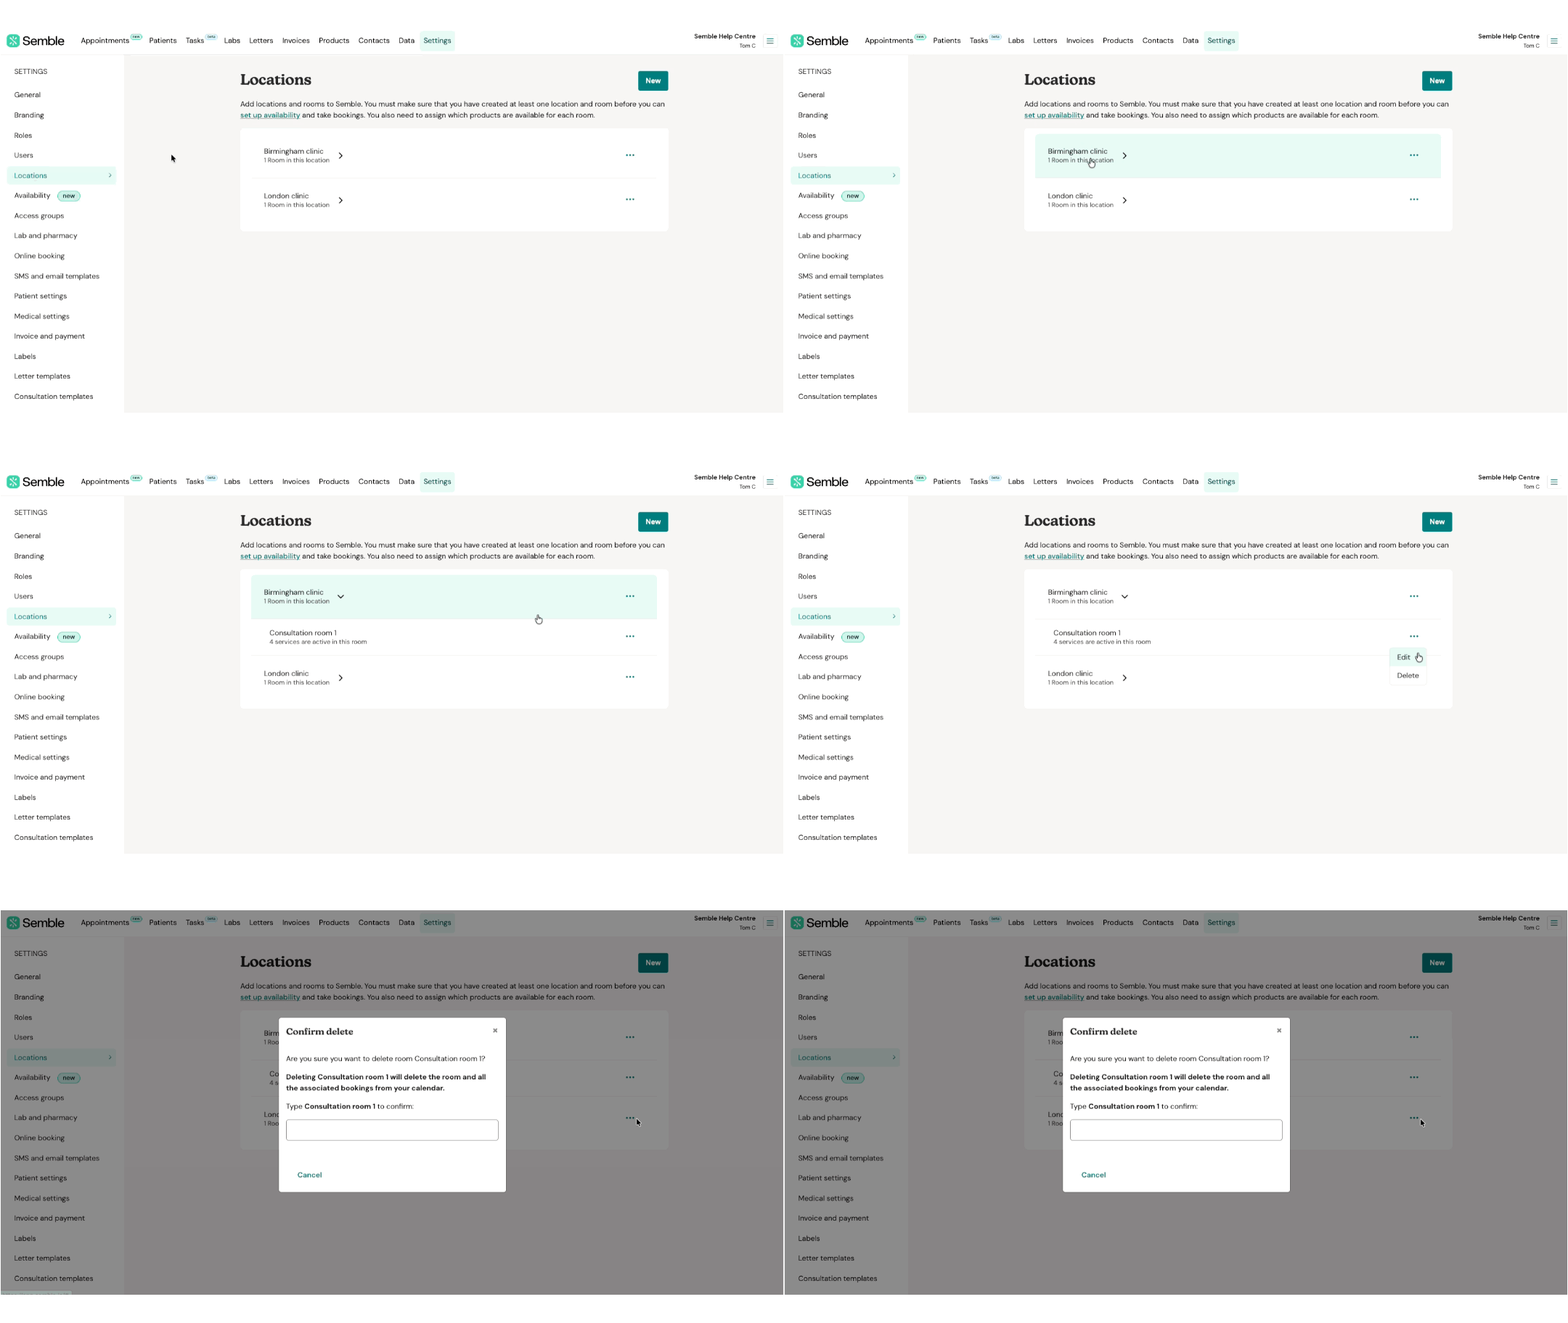
4. Type the room's full name into the confirmation box. Note: Make sure you type any spaces or special characters in the name.
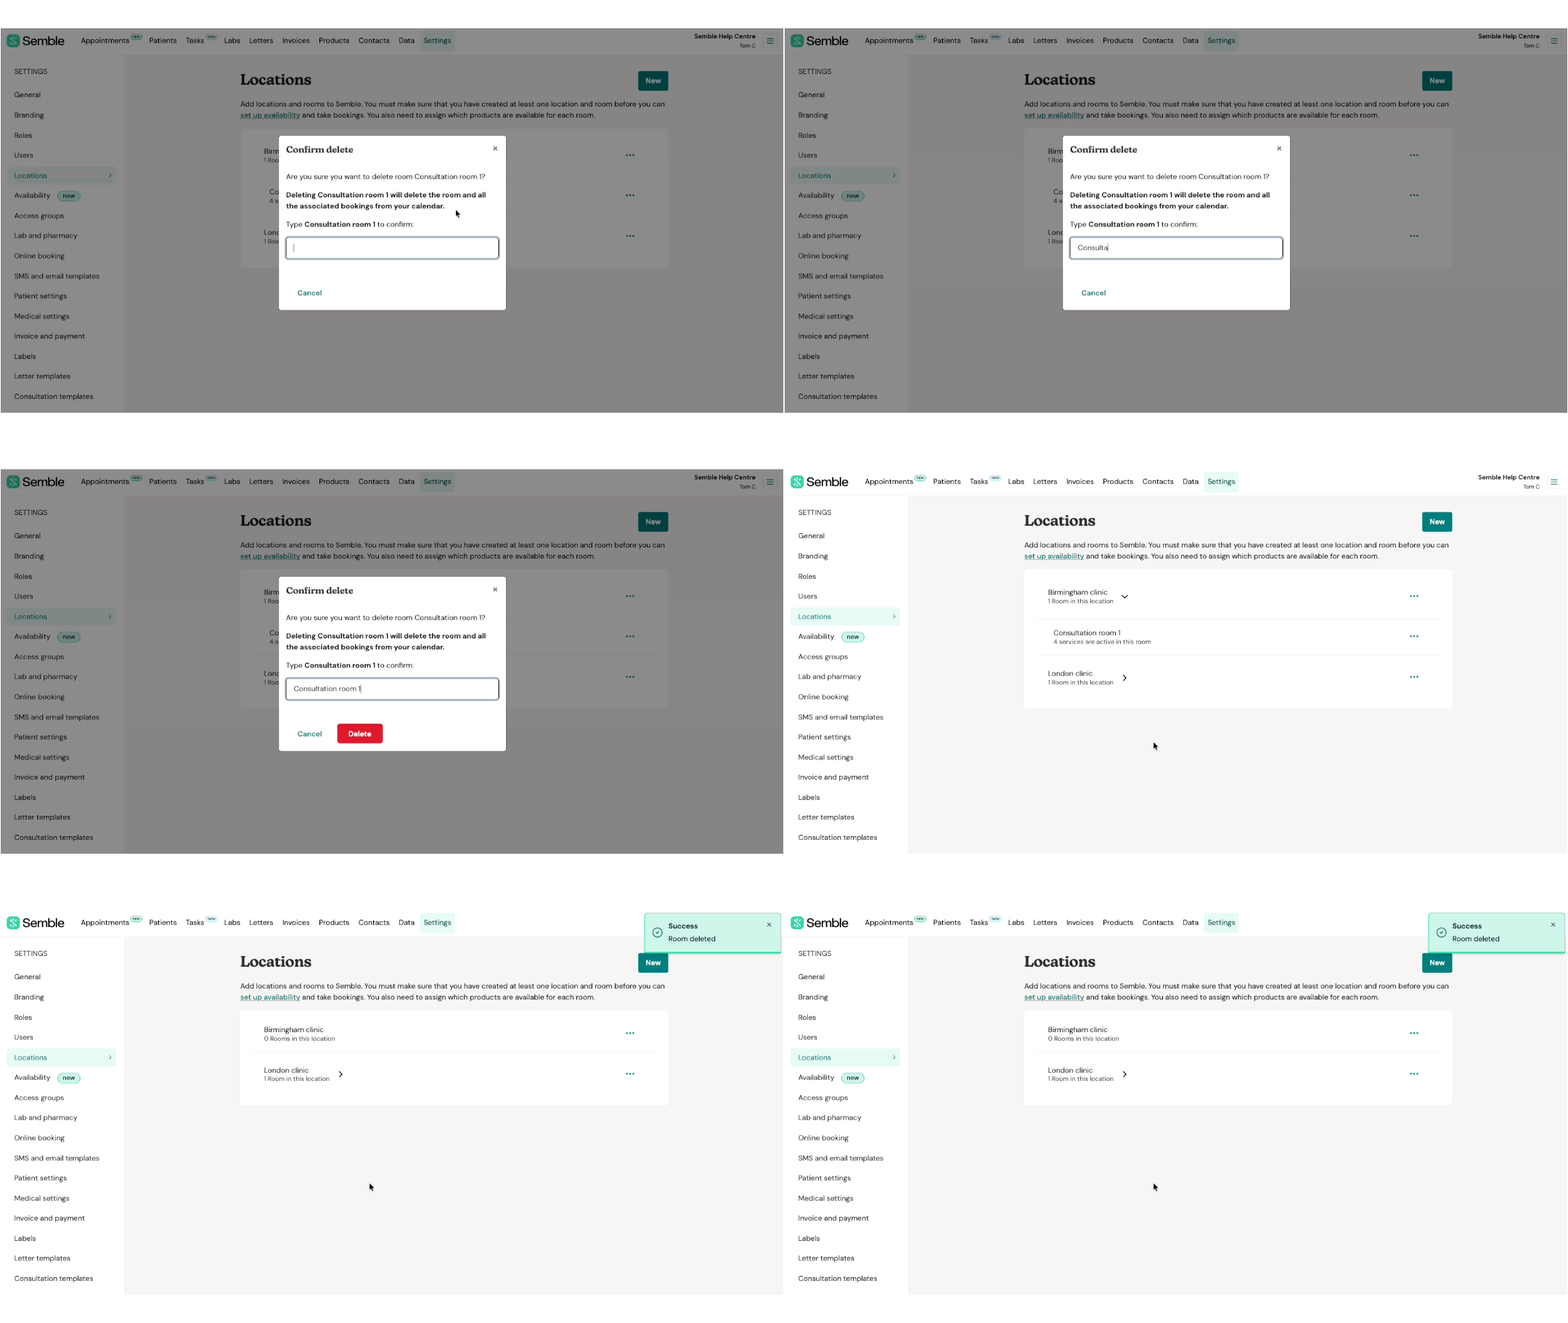
5. Click 'Delete to confirm the deletion.
The room is deleted from your clinic. All bookings that are linked to the room are also deleted.
Double-booking warnings
The double booking warning is designed to notify you of potential scheduling conflicts. This warning will appear if:
-
There is already a booking in the same room at the selected time and date.
-
There is already a booking with the same clinician at the selected time and date.
There is already a booking in the same room at the selected time and date.
There is already a booking with the same clinician at the selected time and date.

Please note, this warning will not prevent you from creating the booking. It serves as a reminder to review your appointments and ensure no unintended overlaps occur.
Disabling the the double-booking warning
We have introduced a feature that enables clinicians to disable the double-booking warning.
-
To disable this warning please go to your "Availability" tab under "Settings"
To disable this warning please go to your "Availability" tab under "Settings"

2. You can then enable or disable the feature by clicking on the on/off button

Create a Location Header
You can create an address header for an existing location at any time from the Settings page:
If you do not add anything in the Location Header field, the address that will be shown on the invoice is the one in the General Information field.
1. Go to the Locations tab.
2. Click the more options icon [] next to the location that you want to add a header for.
3. Select 'Edit'.
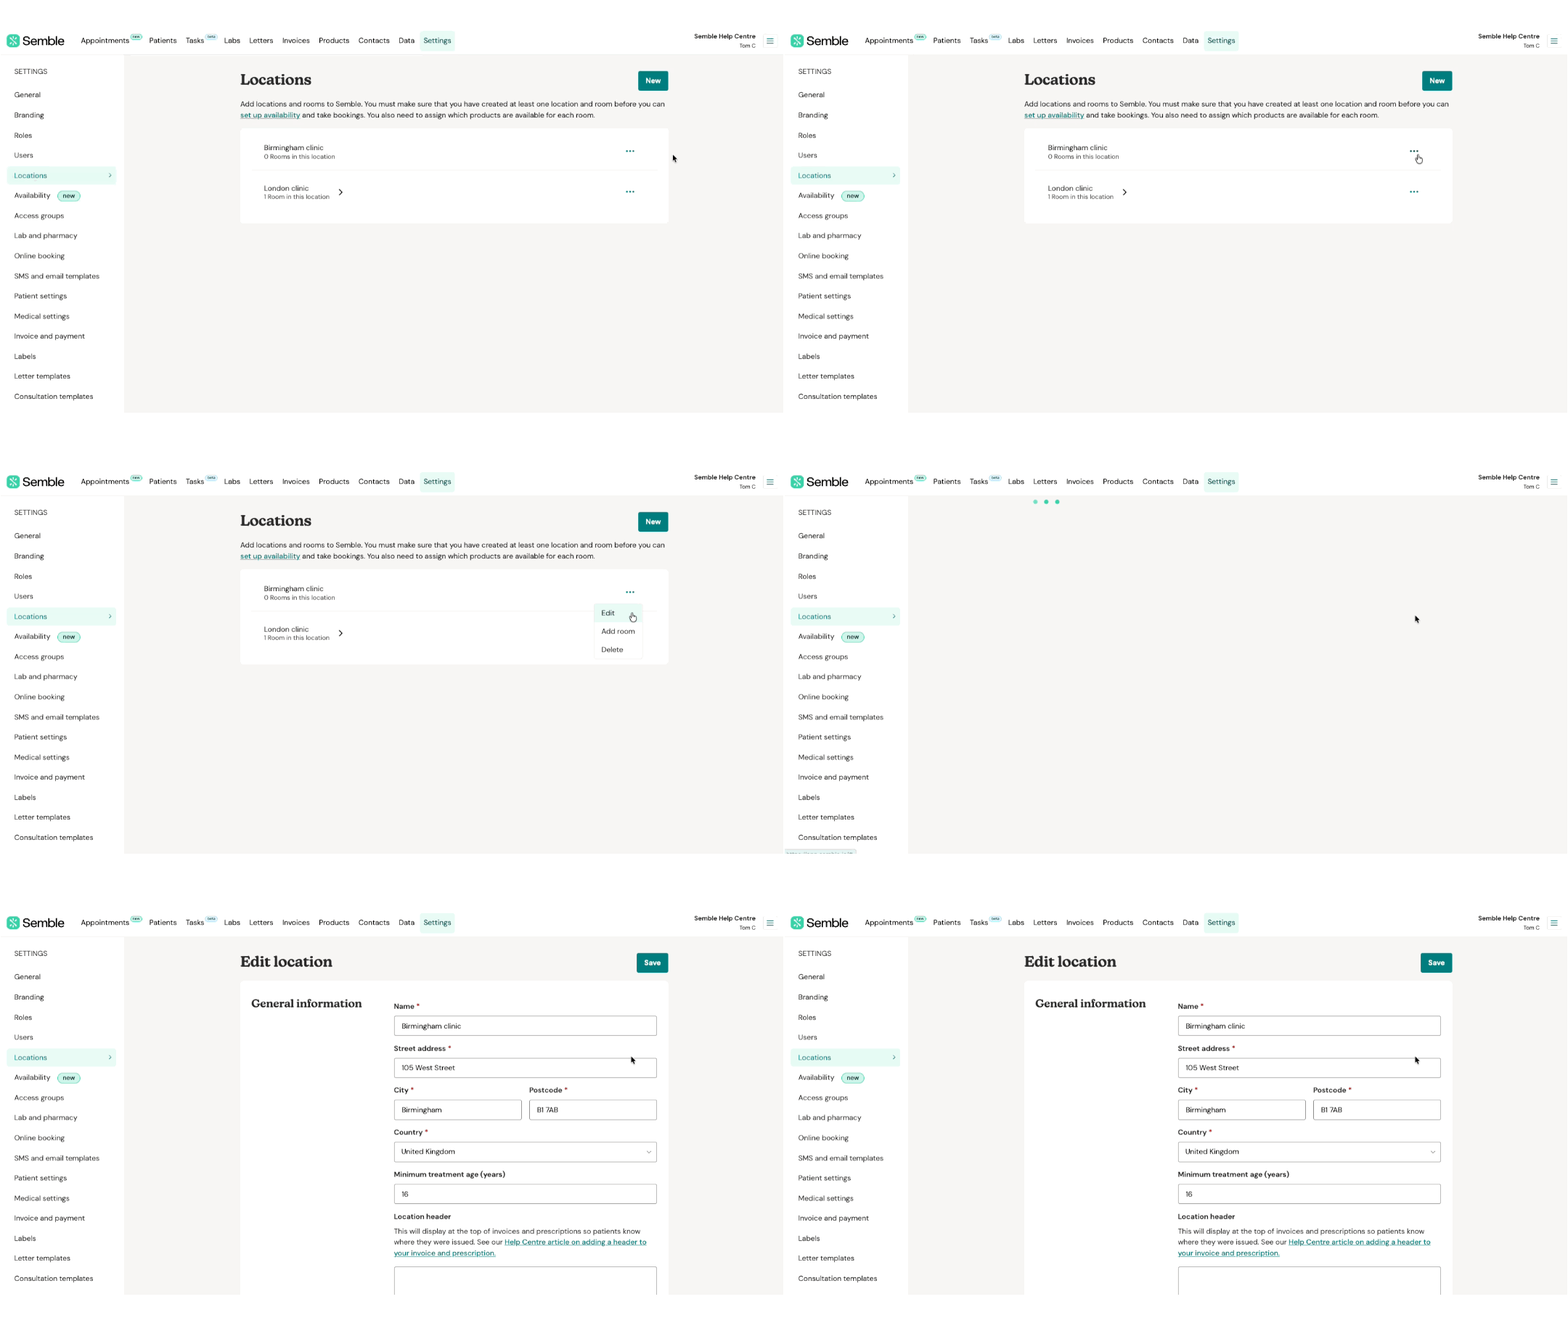
4. Go to the General information section.
5. Type the header that you want into the Location header field.
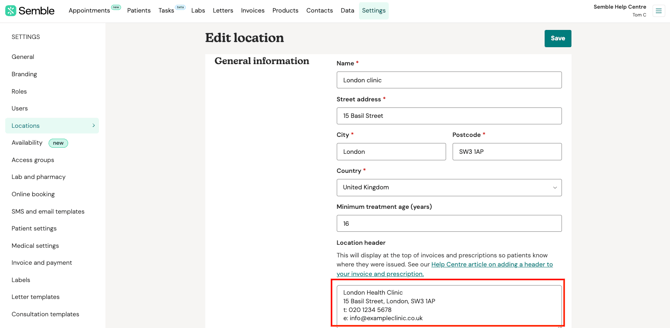
6. Click 'Save'.
You can now add this location header to an invoice or prescription.
Add a Header to an Invoice
When you have created a location header, you can add it to any new invoice from the Invoices page:
1. Start creating an invoice as you normally would.
2. Open the Header dropdown, and select the letterhead you want for the invoice.
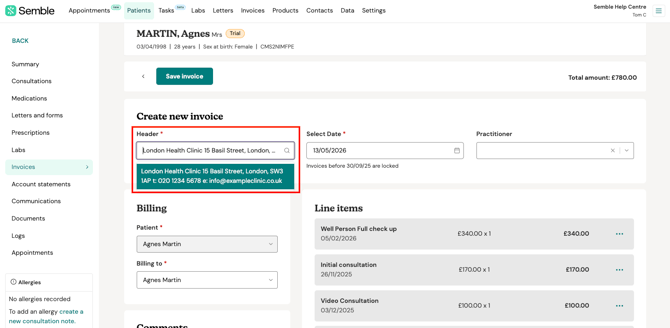
3. Finish creating the invoice.
The location header will be shown on the invoice:
Header for your prescription
Once you have added a location header in the location settings, your clinic address will automatically appear in the footer of your prescriptions:
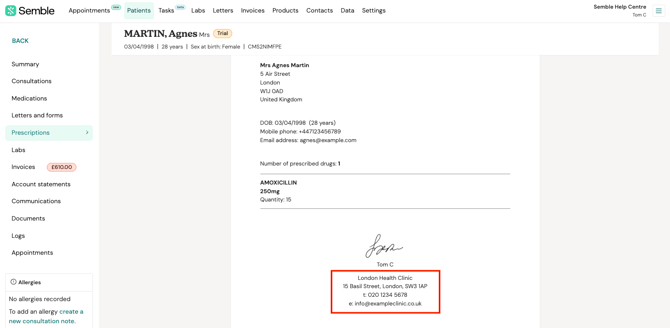
You can change the placement of this to be aligned left, right or central through your user settings. See here.