
Note: To create and manage appointment types, you must have a role assigned to you that gives you editing permissions for Products.
In this article:
Configure a Product to Require Payment
Configure a Product to Require Confirmation
Linking a Consultation Template to a Bookable Product
Linked Articles:
Overview of Products (Non-bookable)
Overview of Theatre Appointments
Create Bookable Products
You can create a bookable products from the Products page:
1. From the Products page, select New

2. From the Type dropdown menu, select The product you would like your patients to be able to book.

3. Tick the box that states This is an appointment that can be booked in the calendar.
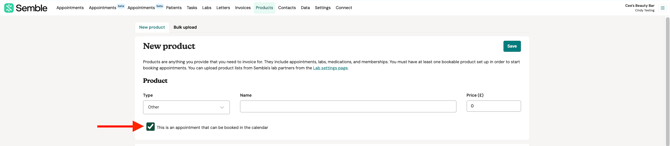
Note: When you choose the Product Type as "Appointment" this box is ticked by default.
4. (Optional) Choose the colour. If you want your appointment types to be colour coded on your calendar you can give each of them a specific colour.
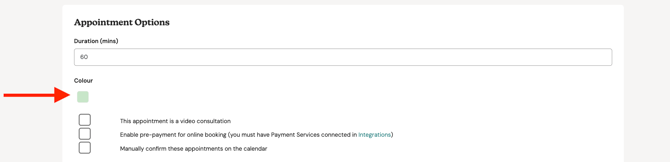
5. From the Add Locations drop-down menu, select the relevant locations where the product will be provided

6. From the Add Clinicians drop-down menu, select the relevant clinicians that will provide the product

7. Click Save.
The appointment will now be bookable for the locations and clinicians selected.
Configure a Product to Require Payment
IMPORTANT: You will need to be integrated with Stripe or Semble Pay in order to activate payments. If you activate payment for your product but do not have an integration with a Payment Service your patients won't be able to book online.
You can configure any number of products to require confirmation, from the Products page:
1. Select the product you want to edit.

2. Click the edit icon in the top right-hand corner.

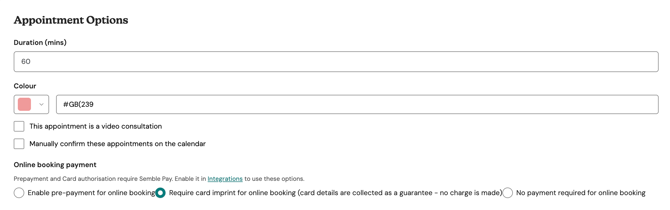
3. Scroll down to the Appointment Options section and find Online booking payment.
4. Select one of the three options:
| Option | What it does |
|---|---|
| Enable pre-payment for online booking | The patient must pay in full at the time of booking. |
| Require card imprint for online booking | The patient's card details are collected as a guarantee — no charge is made at the time of booking. |
| No payment required for online booking | The patient can book without providing any payment details. |
Click Save at the top of the page.
Note: Payment will only be required for online bookings not manual bookings.
Configure a Product to Require Confirmation
You can configure any number of products to require confirmation, from the Products page:
1. Select the product you want to edit.
2. Click the edit icon in the top right-hand corner.
3. Scroll down to the Appointment options section, then tick the Manually confirm these appointments on the calendar box.
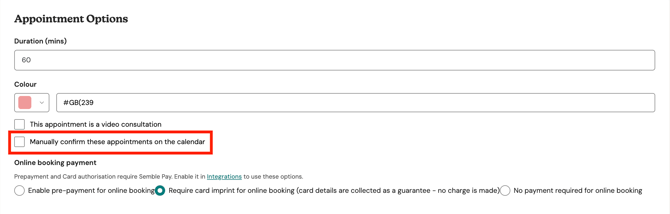
4. Click Save at the top of the page.
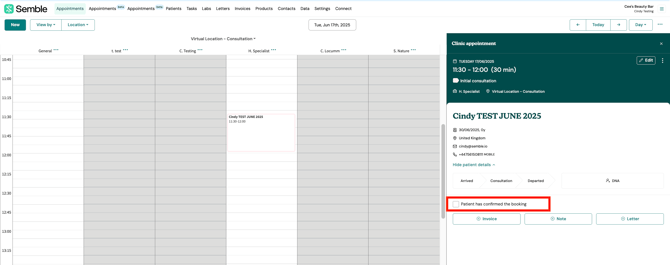
Now, when you book an appointment with that product, it will require for a user to manually tick the box in the appointment for confirmation.
Before the box is ticked, the appointment appears as an outline:
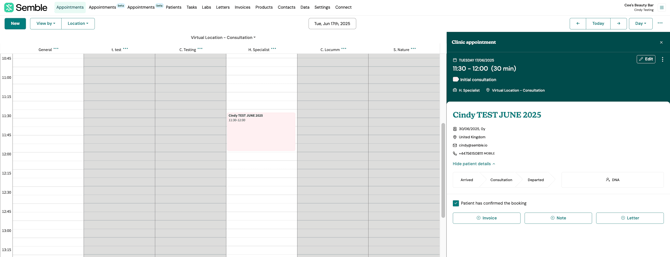
Once the user ticks the box, the appointment will be fully coloured for visual clarity.
Linking a Consultation Template to a Bookable Product
In Semble, a bookable product is an appointment type that can be scheduled on the calendar. Each product defines the appointment name, duration, price, and which clinicians and locations it is available for.
Linking a consultation template to a bookable product means that whenever a clinician starts a new consultation note directly from that appointment, the correct template loads automatically. This saves time and ensures the right structure is consistently used for each appointment type — for example, automatically loading an Initial consultation template for first appointments and a different template for follow-ups.
How to link a template to a bookable product
- Go to Products from the main navigation.
- Select the product you want to update, or click New to create one.
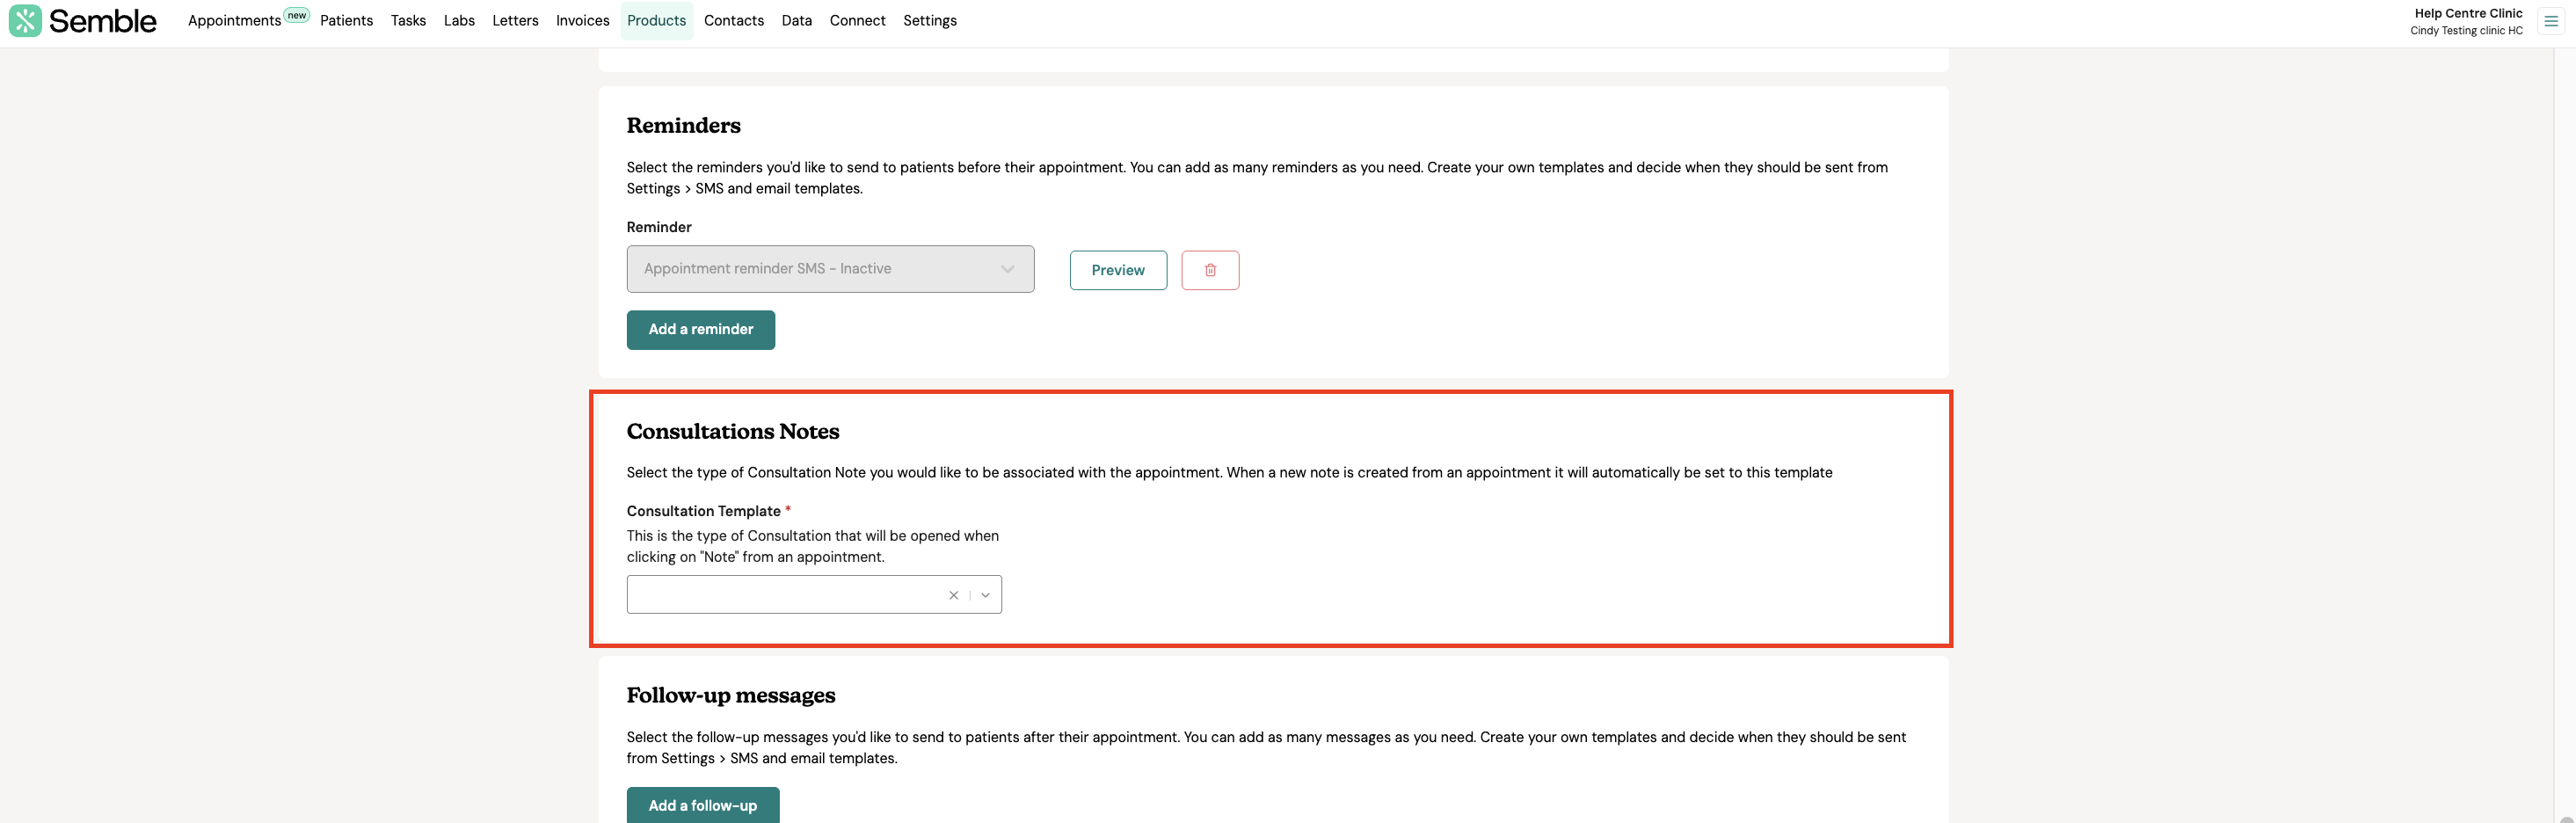
- Scroll down to the Consultation Notes section.
- Under Consultation Template, select the template you want to associate with this product from the dropdown.
5. Click Save.
When a clinician clicks + Note on an appointment in the calendar, the linked consultation template will load automatically — no need to manually select it each time.
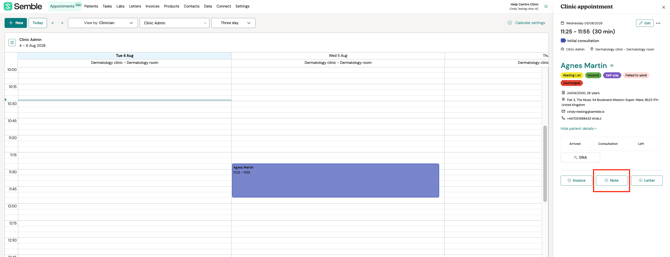
The template name will appear pre-selected in the template dropdown at the top of the consultation note.
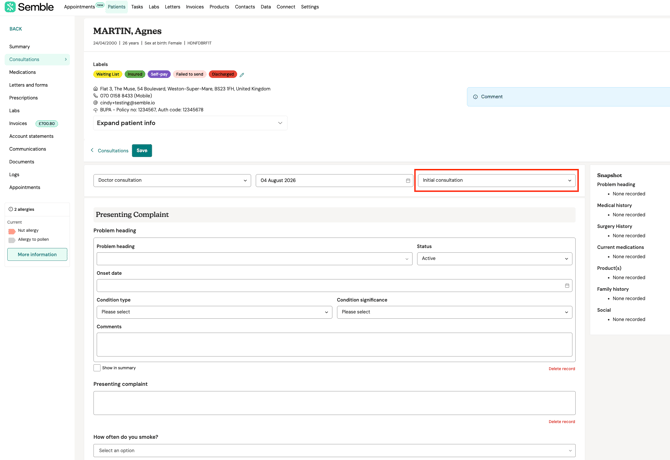
NOTE: The clinician can still change the template manually from the dropdown within the consultation note if needed. You must have already created and saved your consultation template before it will appear in the product settings. For guidance on creating templates, see this guide.
Confirm an Appointment
When you have configured a product to require confirmation, the patient will need to confirm appointments that have that product as part of the booking.
To confirm an appointment:
1. Create the booking with that product as you normally would. For more information on how to create a booking, see here.
2. Select the booking in the Appointments calendar.

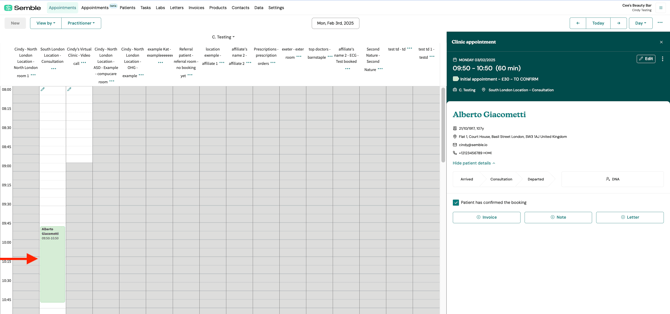
3. Tick the Patient has confirmed the booking box.
The appointment will fill in with the colour linked to the product type:
Managing Automated Messages
Click here for a full list of automated messages you can send to patients at different stages—when booking, before their appointment, and after.